Shopping Cart




BMW X6 F16 2014 – Designer Interior Trim Kit – Full Set
GPP-BMW-X6-01
€39.99
Tax included Manufacturing time 2-7 business days
Vehicle-specific decorative overlay kit for the existing interior surfaces of your BMW X6 F16. Choose the finish and verify the parts diagram before ordering.
| Make | BMW |
|---|---|
| Model | X6 F16 |
| Model years | 2014 |
| Generation | 2nd generation (F16) |
| Generation built | 2014–2019 |
| Product type | Custom interior trim |
| Parts included | Not specified |
| Product reference | Product ID 374 |
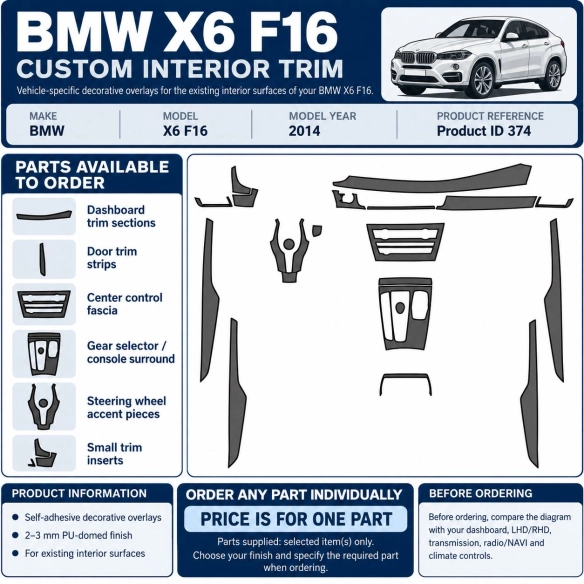
| How to check your version | Before ordering, check on your vehicle and compare with the parts diagram: radio / NAVI unit, transmission, climate control. Steering wheel position (LHD/RHD): select it in the option below. |
BMW X6 F16 2014 – Designer Interior Trim Kit – Full Set
Create your own exclusive trim with us
Designer Trim for BMW X6 F16 2014 is a physical set of pre-cut, flexible, self-adhesive decorative overlays. You apply each piece over the corresponding existing interior trim. It refreshes the visible finish without replacing the original panel.
Change a colour you no longer like, cover cosmetic scratches within the covered areas and give the included trim a coordinated appearance. This is a decorative upgrade, not a repair for cracked, loose or peeling panels.
What you are buying
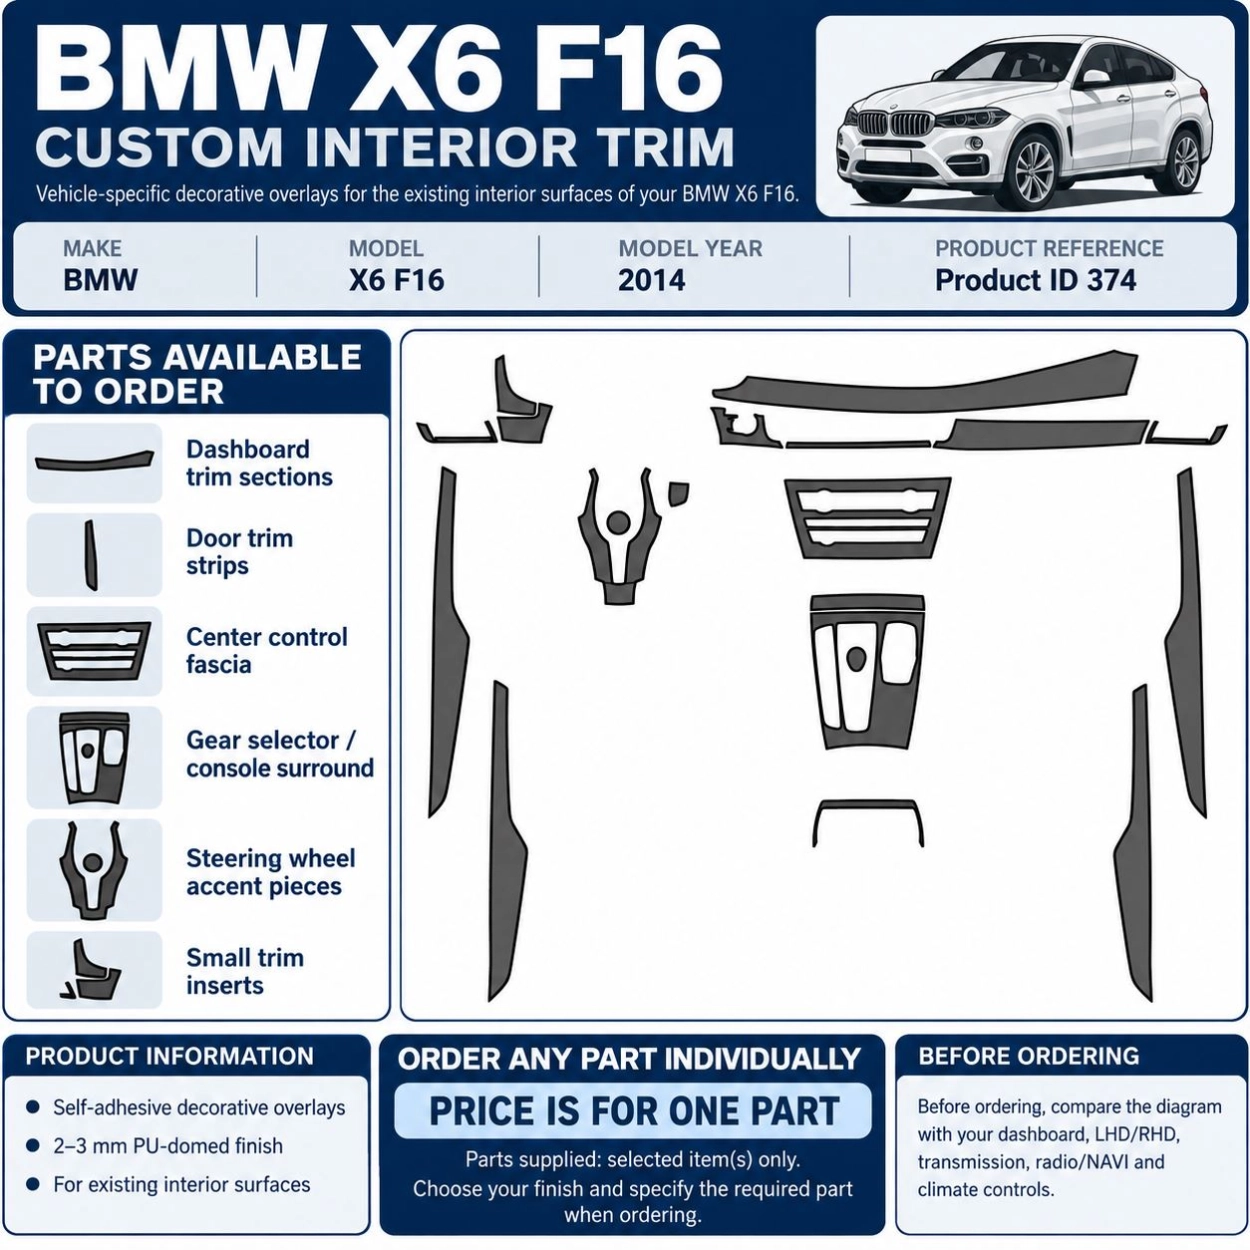
| Vehicle listed | BMW X6 F16 2014 — compare the parts diagram with your actual interior. |
|---|---|
| Supply | Full set as shown in the confirmed parts diagram; optional pieces are separate selections. |
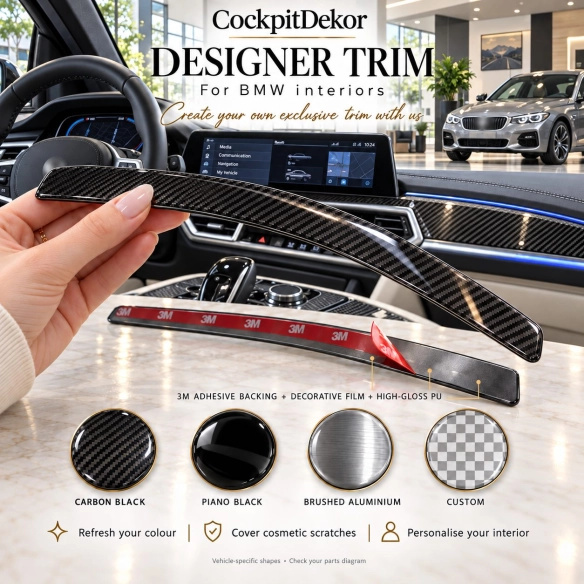
| Construction | 3M adhesive backing + decorative film + transparent polyurethane (PU). |
| Surface | High-gloss 3.5 mm PU doming with smooth, rounded edges. |
| Application | Flexible overlays for the specified trim areas, supplied pre-cut with adhesive backing. |
| Not included | Replacement panels, digital cutting files, wrapping-film rolls, display protectors or LED lighting. |
Choose your finish — the photograph does not choose it for you
| CBF — Carbon Black | Fine black carbon-look pattern beneath clear, glossy PU. |
|---|---|
| BLACK — Piano Black | Smooth, glossy black with no wood or carbon pattern. |
| ALU — Brushed Aluminium | A brushed-metal appearance beneath clear PU. |
| CUSTOM — Your choice | Choose an exact premium film colour or printed wood design from the colour chart. |
Carbon and aluminium describe the decorative appearance; they do not mean a solid carbon-fibre or aluminium panel. Printed wood designs are not natural wood veneer. Screen settings and lighting affect colour perception. If an exact match matters, ask about a physical sample before ordering. Do not assume a match to factory trim or a previous batch.
Customise your trim with stripes, logos and lettering
Create your own exclusive design with red or blue accent stripes, other requested colours, logos, initials or lettering. Combine a chosen base finish with UV-printed details, subject to confirmation of the design and production method.
At checkout, specify the part numbers, base finish code, stripe colours, width in millimetres, position and direction. For logos or lettering, provide the artwork or exact text, required size and placement. If file upload is unavailable, contact us with your order reference to arrange the artwork.
We must confirm that the design can be produced and agree any additional charge before production. Approve the final layout, spelling, colours and placement before we make your custom pieces. A product photograph is an example, not an automatic design selection. Use artwork you own or have permission to reproduce. Logos are decorative custom artwork; they do not imply vehicle-manufacturer approval.
Check the fit before ordering
- Compare every required shape, opening and control with the numbered diagram. A model name and year alone may not identify your interior version.
- Confirm production year, body style, left- or right-hand drive, trim level and pre-facelift or facelift version where relevant.
- Check the multimedia screen, centre-console controller, gear selector, climate controls and door equipment. Aftermarket equipment can change the required shapes.
- If the layout is unclear, send clear dashboard, centre-console and door photographs before ordering. A general brand image is only an illustration; use the vehicle-specific diagram for the contents.
Describe everything in Order description
Enter all customisation details in the Order description field at checkout: your vehicle and interior version, part numbers, base finish code, stripe colours, width and placement, logos, exact lettering, dimensions and orientation. Include artwork references or filenames; if you cannot attach the artwork, mention it here and contact us with your order reference. The more complete your description, the more accurately we can make your order. Any unclear details, custom layout and additional charges must be agreed before production.
The combination of 3M adhesive, premium decorative film and PU is costly. Cutting and coating are specific to your selection. Accurate instructions help prevent remakes and material waste. If you notice an error after ordering, contact us promptly; a change may no longer be possible once production has started.
Before you peel: inspect, compare and test the position
- Unpack and check the finish, piece numbers and condition. Keep the release liner on while checking each piece against its intended position.
- If a piece looks wrong, damaged or does not align, stop and contact us. Do not trim it, force it into place or remove its backing to test adhesion.
- Use only suitable, sound surfaces. Dirt, wax, silicone dressing, loose coatings and previous repairs can affect adhesion. Follow the supplied preparation and installation instructions.
- Once the fit is confirmed, follow the instructions for removing the liner, positioning and pressing the piece down. Avoid touching the adhesive. Do not stretch, sharply fold or overheat the overlay.
- Keep airbags, seams, controls, vents, sensors and moving parts unobstructed. Follow the supplied temperature and bonding-time guidance; ask us if instructions are missing.
Care and removal
Use a soft microfibre cloth and a cleaner suitable for the coating. Avoid abrasives, aggressive solvents and picking at the edges. Removal is not a promise of reusability or a damage-free result: the condition of the underlying finish matters. Ask for guidance before removing an installed piece.
Only need selected pieces?
Use the matching individual-piece listing, where available, and identify each piece by its diagram number. One ordered unit means one piece; add further pieces to build your own kit. Check the current price on that listing. For replacements, include your original order reference and finish code.
Order changes, returns and refunds
- Check the shop’s returns terms before purchase. For a return, contact us for instructions and provide your order reference. If reporting a problem, photographs of the piece and the intended fitting area help us assess it.
- For change-of-mind returns, statutory withdrawal rights apply where available. Clearly personalised goods may be exempt where the law allows; a standard colour choice does not by itself establish that exemption.
- A custom order does not remove your legal rights if goods are defective, incorrect or not as described. Any remedy, return costs and refund are handled under applicable consumer law.
- If you discover a problem before fitting, keep the pieces uninstalled and protect the backing while contacting us. Inspecting before installation helps avoid unnecessary damage; this advice does not limit your statutory rights.
Quick answers
Will this replace my dashboard or door panel?
No. These are decorative overlays fitted onto the corresponding existing trim.
Does “Full Set” cover every surface in the cabin?
No. It means the included pieces in the confirmed diagram. Optional pieces, displays and other uncovered areas are not automatically included.
Can I choose wood or a different colour?
Yes, through Custom, subject to the selected finish being confirmed. Use the exact colour or printed wood code.
Are the photographed pieces the exact shape for every model?
No. Generic images demonstrate the finish and construction. The vehicle-specific parts diagram defines the shapes.
Useful information
Check the diagram. Choose the finish. Confirm your order details.
Carbon finish for BMW X6 F16 2014
Choose carbon-look dashboard trim for BMW X6 F16 2014 with the CBF — Carbon Black finish. These pre-cut carbon-look decals combine flexible synthetic decorative film, adhesive backing and a clear glossy PU surface. The carbon-fibre pattern is a decorative finish rather than a structural carbon-fibre panel. Check the parts diagram to confirm which existing interior surfaces are included.
See the carbon-look trim installation guide (EN) or ask about your carbon finish (EN).
20 Items
New
5483230003747
The kit is fitted over the existing surfaces – no dismantling of the dashboard.
- Clean and degrease every surface; silicone and interior sprays stop the adhesive from holding.
- Dry-fit each part against the parts diagram before removing the backing film.
- In a cold car, warm the parts and the dashboard slightly first.
- Press each part firmly from the centre to the edges.
- Avoid washing or stressing the edges for 24–72 hours.
Every kit is made in your choice of finish, protected by a high-gloss 3D polyurethane layer.
- Wood (burl, walnut, maple): warm, classic, premium look.
- Carbon fibre: sporty and technical.
- Brushed aluminium: cool, modern, close to OEM.
- Piano black and solid colours: clean or personalised.
- The finish changes the look only – always check the version of your dashboard first.
A kit is made for one exact dashboard layout. Before ordering, check:
- make, model, production year and generation (before or after facelift);
- manual or automatic gearbox;
- manual or automatic climate control, radio / NAVI unit;
- the parts diagram and number of parts in the product photos;
- steering wheel position: select it in the option above the finishes.
No reviews
Tap to zoom